This took way too long to record. Also, sorry if I don’t explain things in depth/at all, this video assumes a basic understanding of computers just so that it stays under 20 minutes.
A $420 Mini Budget Computer
For this project, I built a computer as small and as cheaply as possibly as requested by some of my classmates. I chose the ITX form factor for my parts since that is the smallest mainstream form factor for computer parts, and set myself a budget of $400 since that seemed like a reasonable amount to spend on a cheap computer. In addition, I allowed myself to buy bundles of parts and sell some, but not for the sole purpose of making money/growing the budget — there had to be at least one part in the bundle that I would end up keeping. Looking back, I cannot be happier with the results.
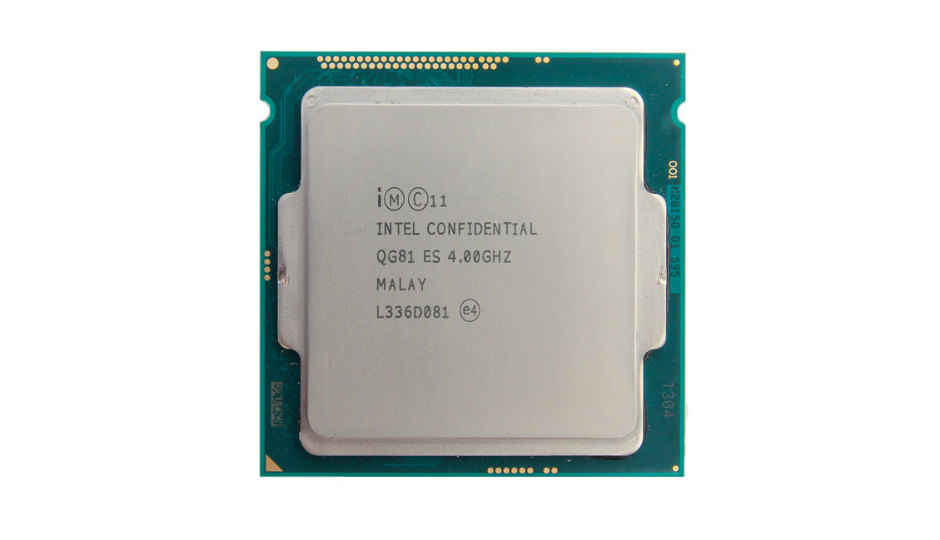
My first purchase was an Intel i7-4790k, msi z97 motherboard, and 8gb of ddr3 ram, which I was able to snag for $80. To put this in perspective, that processor alone is worth around $200 on the used market. I wanted to keep the processor for the build, but the motherboard was too large for this project, and I wanted 16gb of ram in stead of 8gb. I ended up selling the motherboard for $80, and the ram for $25, for a net cost of $-25 for the i7-4790k.

Next, I purchased a Fractal Design node 202, cryorig c7, and some NZXT fans for $20. I was able to sell the cryorig c7 cooler for $30, as I wanted to be able to overclock the processor with a more powerful cooler. This gave the node 202 and fans a net cost of $-10.

After that, I bought a brand new Corsair h55 cooler for $40. Nothing special about this one, but I was able to get it at a $20 dollar discount (normally it is $60).

With all of this out of the way, I was feeling the time crunch before the project and ordered three parts off of ebay, the last of which was supposed to arrive on April 1, the day before I had to finish my ISP. These three parts were a gigabyte z97 itx motherboard for $118, a silverstone 450w psu for $40, and a Gigabyte 1070 itx for $202.
Lastly, I was able to find 16gb of some fast ddr3 ram and a 120gb ssd on craigslist for $40 and $15, respectively, bringing the grand total up to $420 — slightly over budget, but still a great bang for the buck computer.
For reference, the first computer I built/purchased cost twice this much (brand new) and still had much worse performance.
How to Make Money Trading Computer Parts

I wanted to build a computer, but the problem was, I only had $600 dollars. To solve this problem, I turned to something that I knew well and was confident I could make money on: computer hardware.
Since first starting to build computers in 8th grade, I had built several for friends and myself, and had been keeping up with specs and market values of the parts. With that knowledge, I decided I could just buy cheap parts and sell them for more online.

However, I would need some capital to start off, since I had only $600, so I asked my parents for a loan of $720 dollars so I could buy the first two items I had picked out. It took a bit of convincing, but eventually they saw how sure I was of the profitability of my ventures. With my with my 66 $20 dollar bills in hand, I went out into the world to turn my money into more money. I don’t want to bore you with the details, so instead I will just show you some pictures of some of the parts that I bought, and later sold for more.


")


My basic business plan was this: I would scour the local buying and selling pages (Craigslist, OfferUp) for good deals, and then try to get the parts for as cheap as possible. After this, I occasionally sold them locally, but the majority were sold online through r/Hardwareswap, a forum for trading computer hardware. On there, computer components usually sell for more than local, and in some cases (the ones I looked for), they sold for a LOT more. I had to pay Paypal and shipping fees, but even with this, I was able to make money on all of my purchases.
This all started at the beginning of winter break. Since then, I have gotten my drivers license, and my parents are now much more on board with my idea after I started making money and they did’t have to drive me to pick up parts all the time. Through my trading, I was able to make enough money and extra parts to build my new computer (in the post below). Since I started out with $600 dollars and $720 loan, I now have my new computer ($1500 worth of parts), other computer parts I still need to sell valued at $850, $300 cash, and a still-outstanding loan of $720 (I am going to pay my parents back, eventually).
If anyone wants to do something similar, with computer components or another area that they are knowledgeable in, my advice is to know the market and have a plan of where you will buy and sell your goods before you go into it. It isn’t the easiest thing, but if you are interested in something anyway, buying and selling goods you are knowledgeable about is a good side hustle to make some extra money.
Also, if you need some computer parts or a new computer, I know a guy.
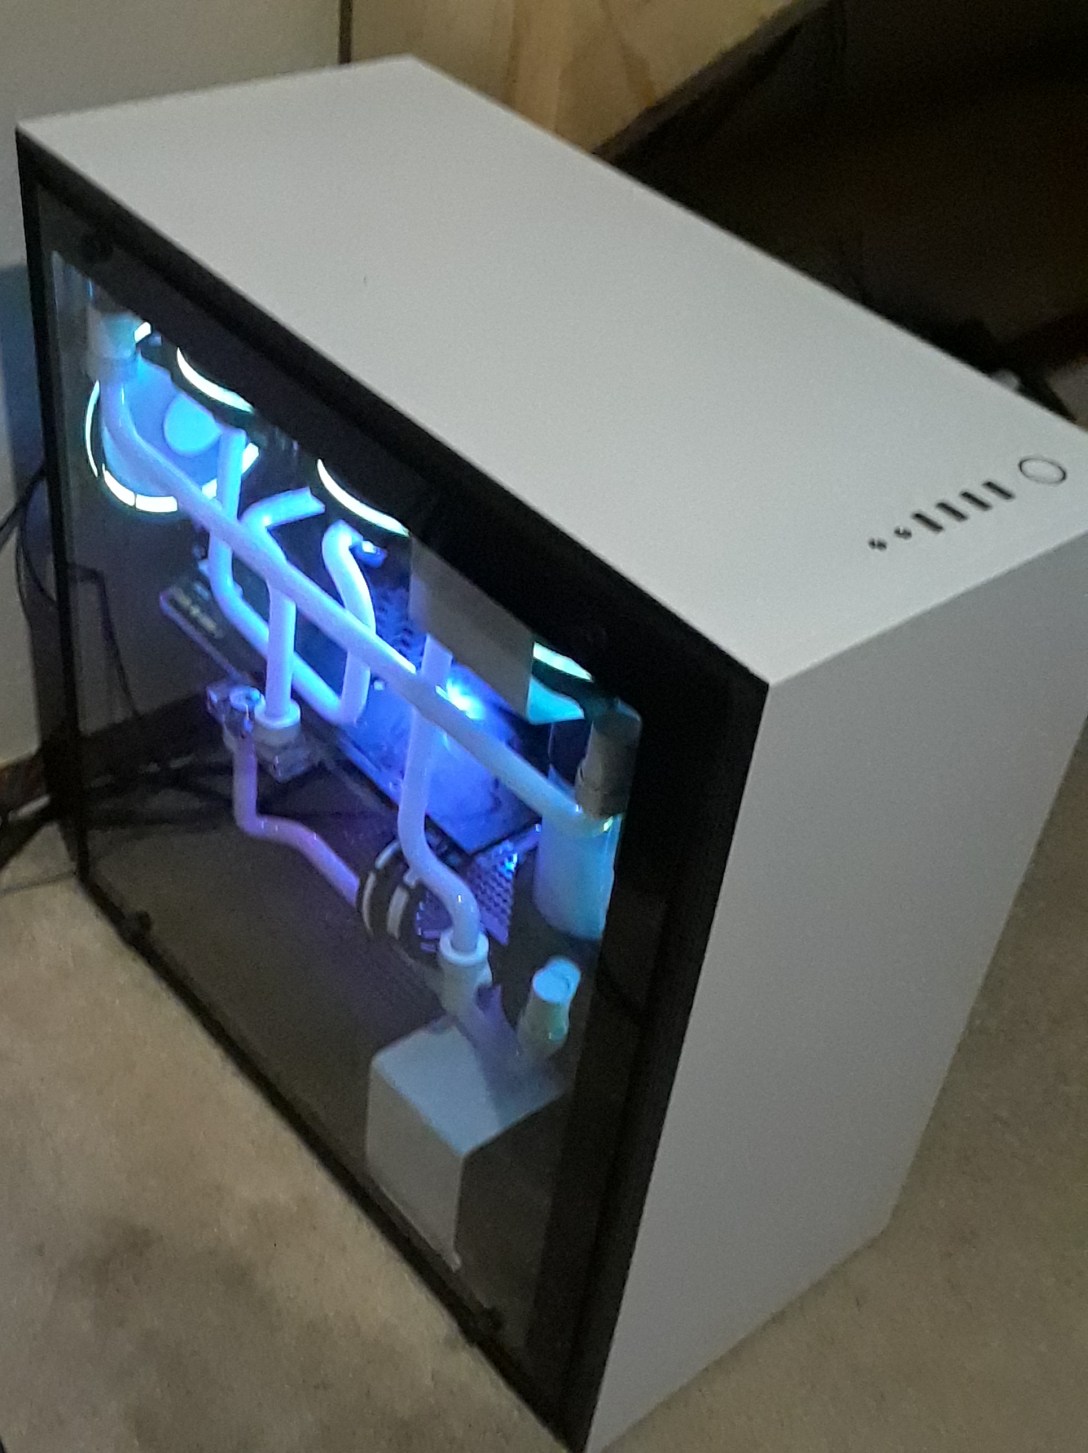
Building a Water Cooled Computer
Ever since I was a small child, I have been fascinated with computers and electronics in general. Knowing that, it is no surprise that I got into building computers later in my childhood. When I was in 8th grade, I built my first computer for around $800. Until recently, I had been using that same computer for everything I did, and in more demanding applications like 3D modeling or running the latest games at the highest settings, it was definitely showing it’s age. Even worse, it looked dated (and it hadn’t been that great looking to start off either).
If I was going to build a new computer, I had to make it both aesthetically pleasing, and powerful enough. This is where I got the idea to water cool.
I think most people know this already, but the vast majority of computers are cooled with air – it’s simple, easy, and completely adequate for most applications. However, cooling with something other than air can have its benefits as well. Water can hold much more heat than air can, so it is more effective in conducting and transferring heat away from components of the computer that need to stay “cool” (under 90C/100C) to preform the best. To do this, water blocks are applied to the processors that need to be cooled, typically the CPU (central processing unit) and GPU (graphics processing unit). This water block is comprised of a metal plate (typically copper or nickel) on the bottom, and another plate (in my case plexiglass for the aesthetic) on the top, with water flowing through the middle to provide the maximum flow rate and surface area over the component to be cooled.


If you read my top blog post, you will see that I actually started with a budget of $600, less than I had back in 8th grade, but had taken out a loan from my parents and bought and sold computer parts to make money, in the process accumulating parts for the build.
If anyone cares (you probably don’t), here are the parts I used:
CPU – Intel i5 7800x @4.8ghz
CPU monoblock – EK-FB GA x299 RGB
GPU – MSI GTX 1080 Seahawk EK X @2.1ghz
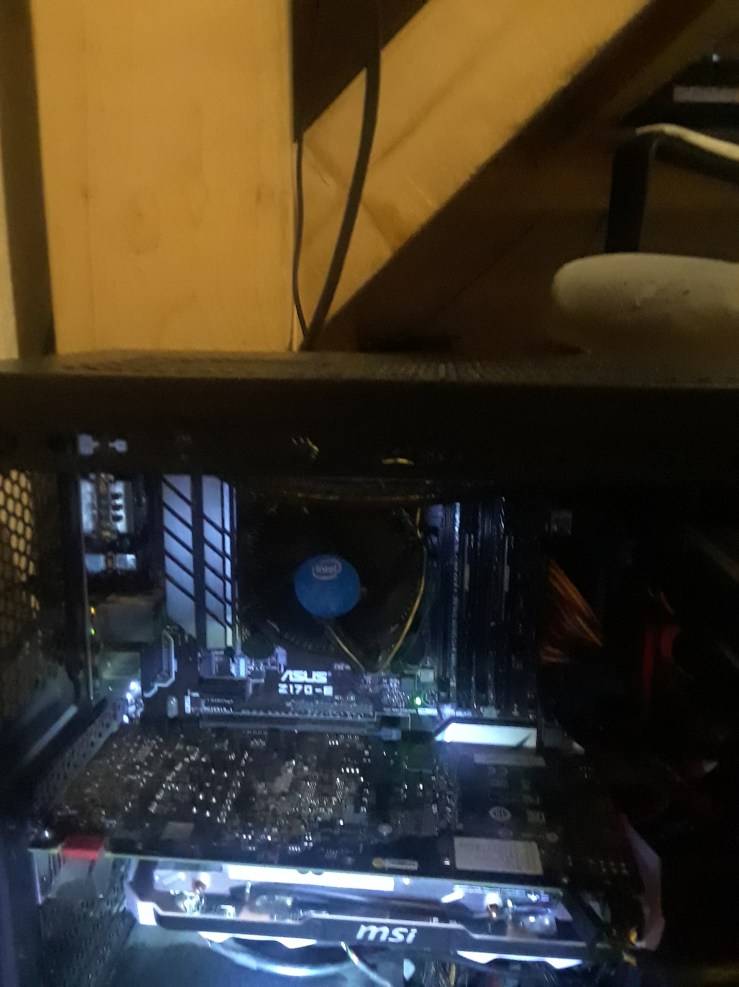
Motherboard – Gigabyte Aorus Gaming 3
RAM – 4x4gb Corsair Dominator Platinum @2666mhz
PSU – EVGA 850 G3 with custom cable extensions from Cablemod
Pump – EK 140 Revo D5
Tubing – 12ft Primochill 1/2in tubing
Fittings – 10x white Primochill 1/2in fittings, 5x unknown 90 degree fittings
Radiators – 2x XSPC 360mm radiators
Case – NZXT h700
Drives (reused from old computer) – Samsung 850 evo 256gb, Seagate 1tb 7200rpm hard drive
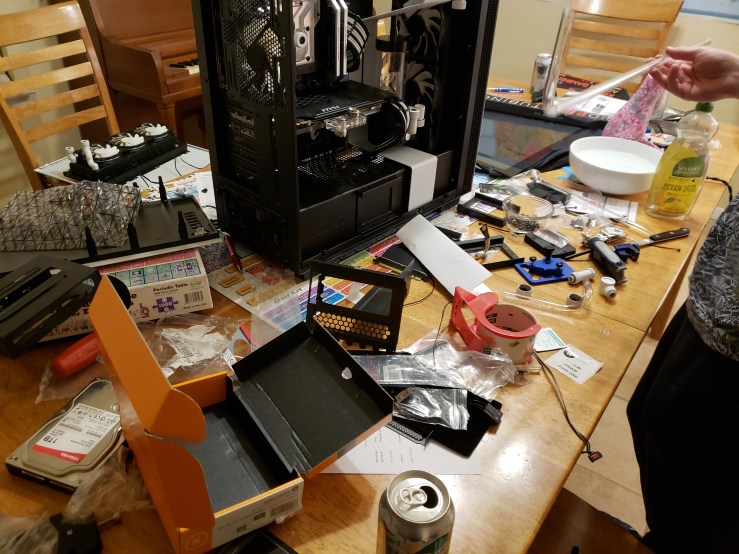
With all my parts purchased from a combination of new and used sources on my tiny budget, I now had everything needed to build my computer. Unluckily, some of the parts arrived late, so by the time the parts had arrived, it was Monday. I spent the next three days coming home after school to work on the computer from about 5:00pm to 1:00am. During this time, this is what my dining room table looked like:

After I completed the “computer” part of the build, it was time for the “plumbing” part of the build.
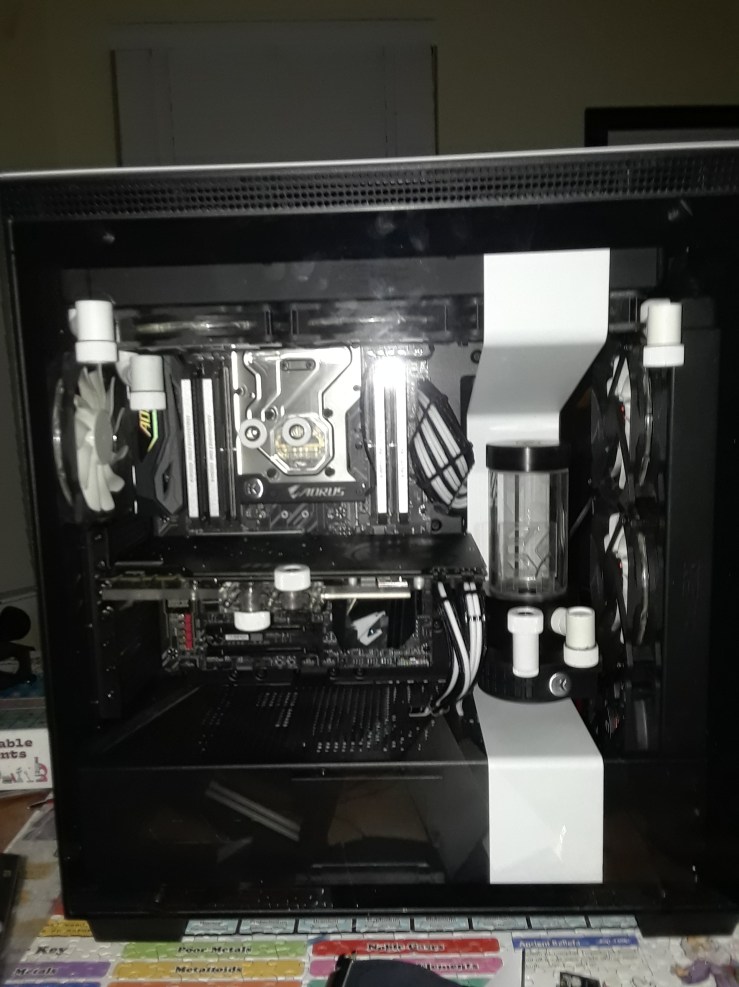

I spent many hours building this computer, and many more hours sourcing all of the parts and making the money needed to complete the build, but after all that I am immensely satisfied with the final product. Finally, after adding the white dye to the coolant and setting up the lights, here it is.


How to Use Computer
An a multi faceted tutorial on the complex task of using a computer.
How To: Creating a Personal VPN with Raspberry Pi

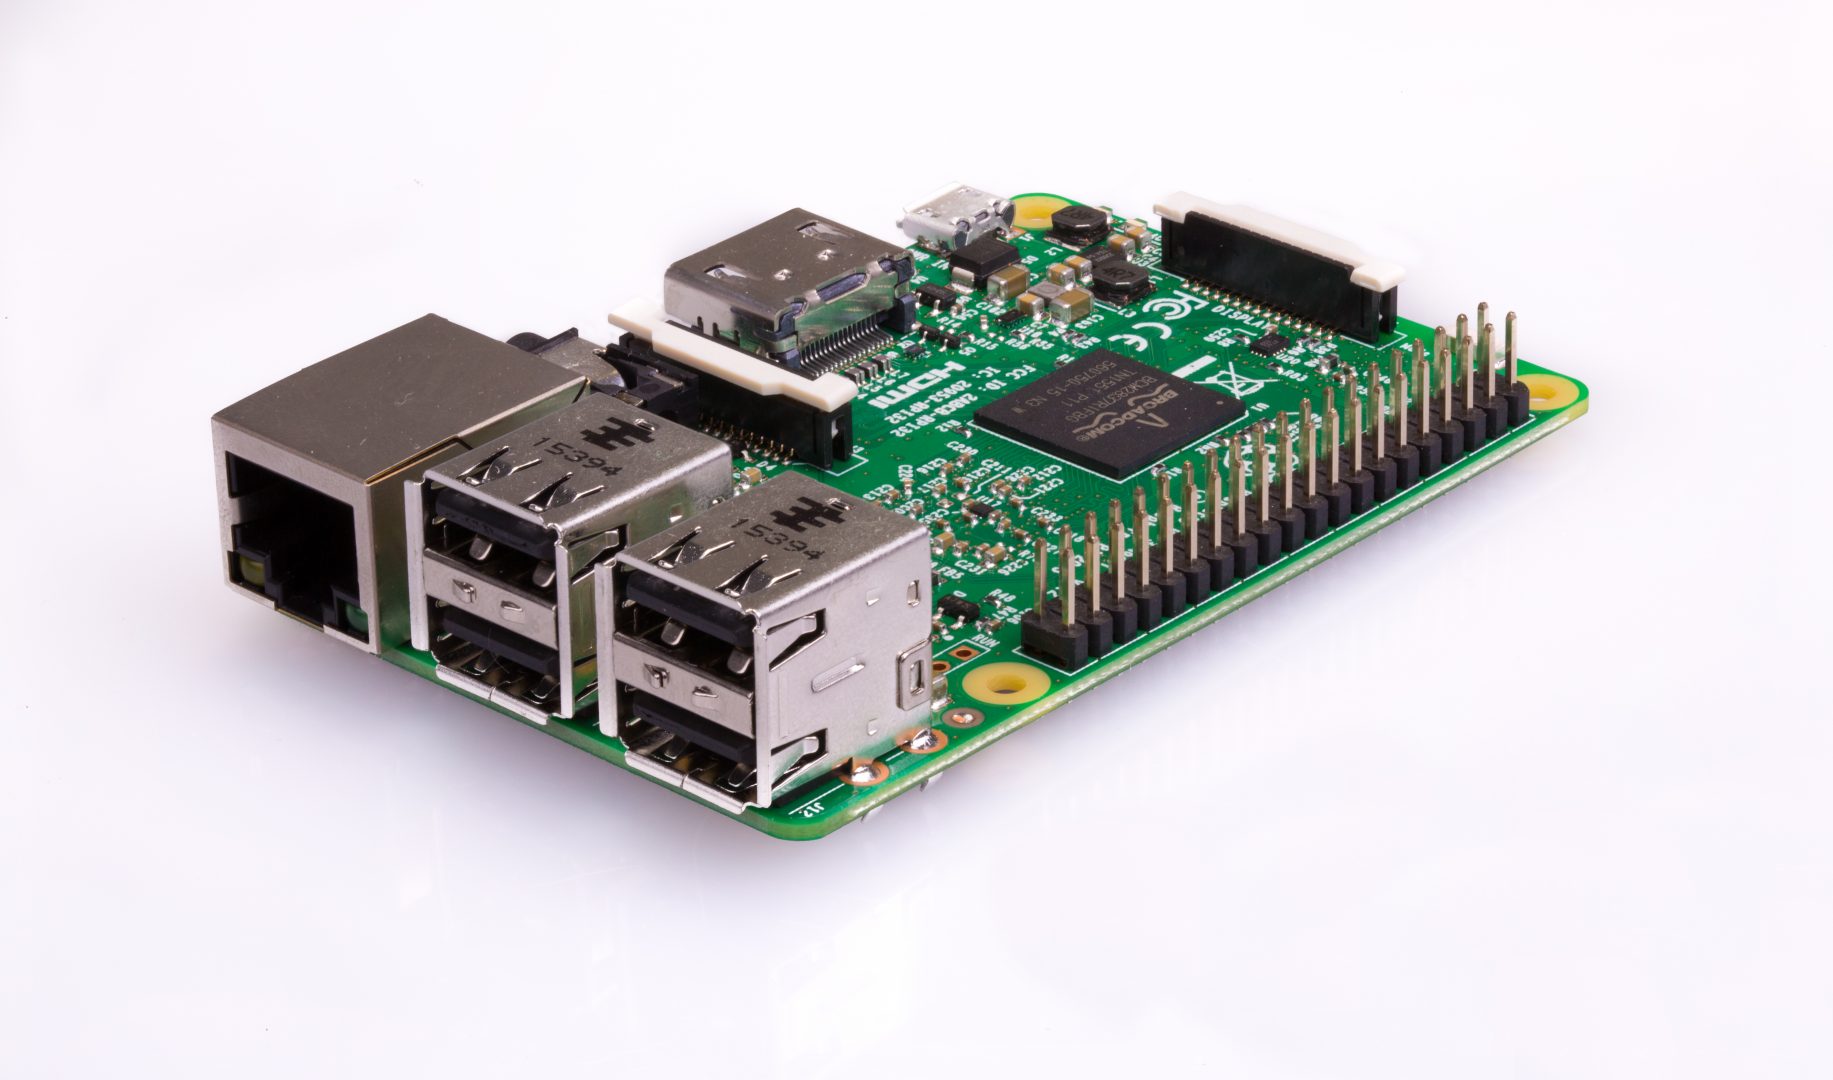
For this entry, I made a VPN using my Raspberry Pi 3. The Raspberry Pi is a $35 dollar bare bones computer that runs a Linux based operating system. It comes without a case or peripherals, but after connecting it to a keyboard, mouse and monitor, it functions much like any other modern computer.
For those wondering what a VPN is and why I need or want one: a VPN is a tool that will allow me to have secure encrypted internet access wherever I am. In addition, this will allow me to connect to my home network remotely, simulating a LAN network from anywhere in the world.
This also enables users to bypass internet restrictions imposed by restrictive governments and schools, such as this one. For any administrators reading, I will definitely not be using my VPN for such nefarious purposes, and I cannot recommend anyone else use a VPN at school either.
With that out of the way, lets get to the good part.
Equipment
All you will need for this project is a Raspberry Pi 3, a micro SD card, and a keyboard, mouse and monitor.
Installing PI VPN
Since manually configuring a VPN is pretty complex, I will be using a tool called Pi VPN that automatically generates encryption keys, manages ports, and manages the IP address of the Pi. You can download the PiVPN install files here. After downloading and running the install script, the automated installer will take over.
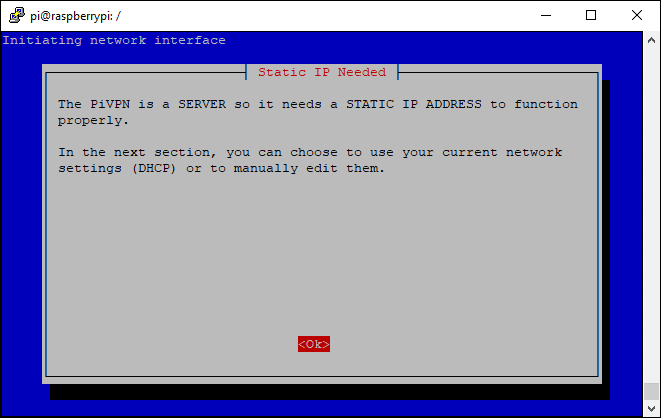
It will ask a lot of questions about what IP address you want to use, and if it should be static or dynamic, but you can just leave the settings at the default values and press ok to get through the dialogue. After the installer is finished, it will ask you to restart your Raspberry Pi. Press “yes” to restart and then we can move onto the next step: setting up your VPN with OpenVPN.
Setting up a VPN with OpenVPN
Now I know you are thinking, didn’t you say we would be using PiVPN to make our VPN? Well, yes, but now we have to use OpenVPN to actually connect to the server that is running with PiVPN.
First, we need to tell PiVPN to make a new VPN server, run this line of code in the command line.
sudo pivpn add
After this, it will ask for a name and password for the VPN. After you do that, PiVPN will generate encryption keys and we can move onto the next step.
Since our client, the Pi, has been set up for VPN use, we now need a way to connect to it. This next step will be done from the computer you want to connect to the PiVPN with. You will need to download a SFTP (standard file transfer protocol) program, like FileZilla to do this. They will keep the file transfer safe and easy, as you are transferring the encryption key of your server; if it is not secure, than your server isn’t either. Run FileZilla, and then, in the text box in the top left where it says Host: type sftp://[your Pi’s IP address]. In the box entitled username, type the local user for the Pi you are on – if you don’t know this, just type
hostname -I
in the command line. Then, in the password box, enter your password. With all this entered correctly, you can click quick connect to the Raspberry Pi. You will be able to see all of the files on the Pi. Go to the /home/pi/ovpns folder, and in there, there is a file called [your server name].ovpn. Drag this file somewhere on your computer to easily copy it to your own computer.
After this is done, you can download OpenVPN. Install the program on the computer you want to connect to the Pi with. When you run the program, it will automatically minimize to your taskbar. To connect to the PiVPN server, right click the computer icon with a lock on the top left that will be located on the right side of your taskbar. Then, click import file, and select the .ovpn file that we got from the Raspberry Pi earlier. After this is done, all that is left to do is right click the OpenVPN icon again and select connect. It will then send the encryption key to the Pi, and you will have to enter the password you set. After this, you will be connected to unlimited safe, private internet access
Congratulations, if anyone actually followed this guide, you now have a working DIY VPN!
The Journey Begins
Thanks for joining me!
Good company in a journey makes the way seem shorter. — Izaak Walton

